Account Administrators can create, edit, and delete users.
This support article illustrates how an Account Administrator can create a new user, and assumes that there are currently available licenses on the account. (If you do not have available licenses, the top of the Account Users page will list the additional user license cost.)
You may also be interested in:
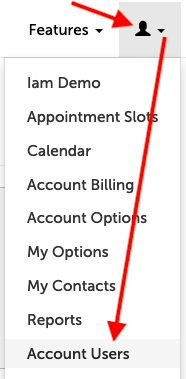
1. Click on the profile icon in the upper right-hand corner and select "Account Users" from the drop-down menu.

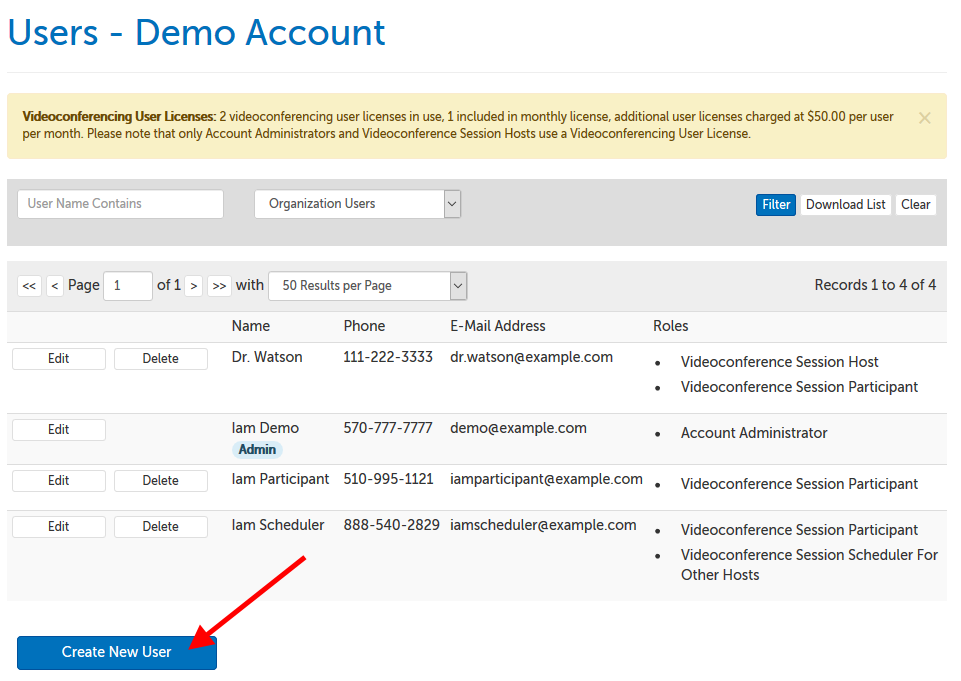
2. This page details your plan pricing at the top of the page. If you are creating a user with an Account Administrator or Videoconference Session Host role, this user will require another user license.
You can also view all existing organization users (or public users, by changing the filter from "Organization Users" to "Public Users") from this page. Use the "Create New User" button in the lower left-hand corner.

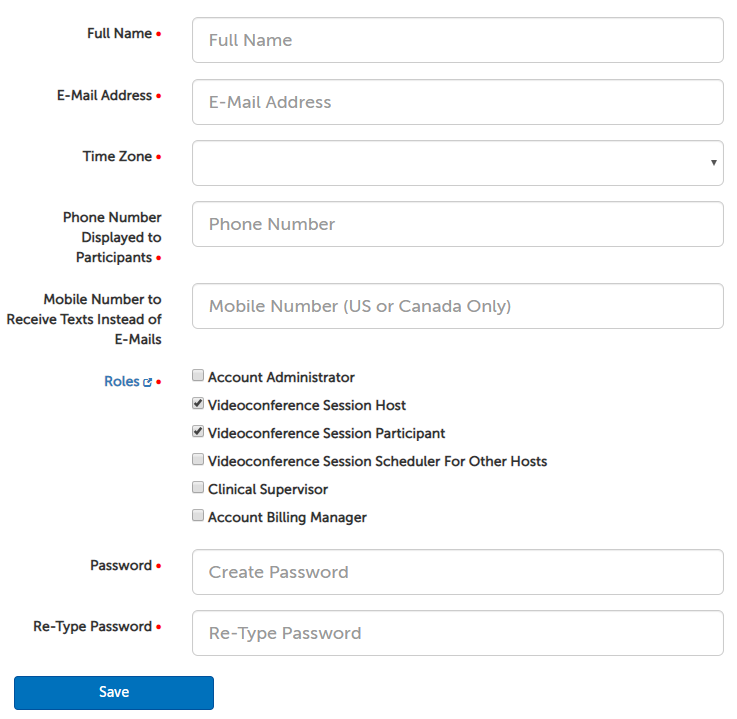
3. You will need to fill out some fields for the new user:

- Name: Enter the user's name.
- E-Mail Address: Enter the user's e-mail address.
- Time Zone: Enter the user's time zone. (This determines how time will display in their account.)
- Phone Number Displayed to Participants: Enter a phone number that a participant could use to reach this user. (If not a direct line, please use an organization phone number where a participant could conceivably leave a message.) This phone number will be displayed on the waiting room pages and at the bottom of e-mail invites.
- Mobile Number to Receive Texts Instead of E-Mails: If this user would rather receive text message notifications where possible instead of e-mails, enter their mobile number here.
4. Indicate what roles you would like the new user to have.
- "Videoconference Session Host" will be automatically checked, but you can remove this prior to saving. This role requires an additional user license.
- "Videoconference Session Participant" will be automatically checked, and is required for all account holders.
- Add any other applicable roles. (Read a description of all possible roles in the support article, Manage users: user roles.)
5. Set a temporary password for the new user. Passwords must follow these criteria:
- is at least 20 characters long
- contains at least 1 uppercase letter
- contains at least 1 lowercase letter
- contains at least 1 number
- contains at least 1 of the following special characters: !, @, #, $, &, or *
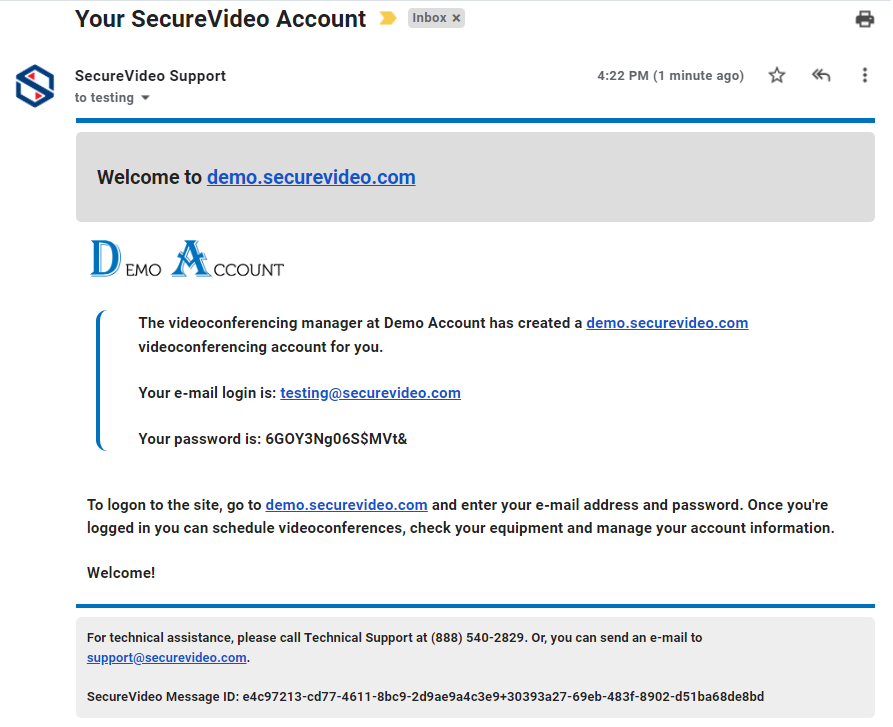
6. Their account will be created once you click "Save", and an email will be sent to their address with the temporary password you have set (example below). They will be required to change their password the first time they log in.

This article was last reviewed by our Support team on July 12, 2022.